React+Flux can do in just 137 lines what jQuery can do in 10
Hi 👋 you're reading a pretty old post! I started writing on here back in high school and this page may not reflect my current views. Recommend checking out related articles and categories down below, I've likely published more recent thoughts on this topic.
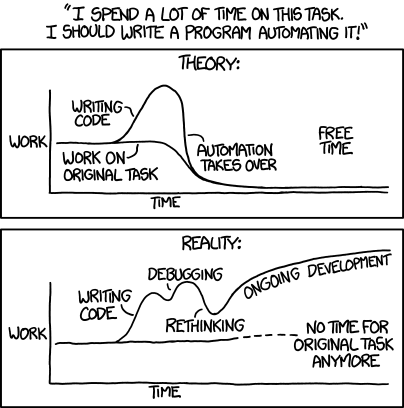
I waste almost 15 minutes a week on an annoying little task. Every email I send to an email list gets a link that says, "Click here to share with a friend."
Clicking the link opens a filled-in email message. Add an address or two, click send, and you're done. You share interesting information with your friends and my emails don't become one of those "Fwd: fwd: re: fwd: kids do the darnedest things!" disasters.
Nobody likes a forward, but everyone likes a direct share. It's different.
Making a direct share link, is as easy as using mailto:?subject=some%20subject&body=some%20very%20long%20body. This type of URL makes a magic email link containing the subject some subject and the body some very long body.
One downside is that the subject and body are URL encoded. Finding an online URL encoder, pasting things in, and copying things out is a long process. Every time you want to change the body or fix a typo in the subject, you have to repeat the process all over again.
Another downside is that the body doesn't support HTML. You must strip it out or change it to Markdown.
This task was annoying me so much that I decided to build ShareThisEmail, a tiny tool that takes a subject and a body, and returns a mailto: link.
Simple, right?
Doing it simply
Yes. It takes just three lines of JavaScript to make the link:
function the_thing (subject, body) {
        var subject = encodeURIComponent(subject),
            body = encodeURIComponent(
                toMarkdown(
                    body.replace(/(?:\r\n|\r|\n)/g, '<br>')
                )
            );

        return "mailto:?subject="+subject+"&body="+body;
    },
Well okay, nine lines with good formatting.
With this function, you encode the subject, encode the body, put the two together, and return the link. Dom Christie made an awesome JavaScript markdown converter that makes this function easy.
You can use jQuery and a "Do The Thing" button, to drive this function with one line of code:
$("#do-the-thing").click(function () {
    $("#link").attr("href", the_thing($("#subject").val(), $("#body").val())
});
That's the JavaScript. Slap together some HTML and you're done. An hour after you started, the utility works, you push it online, and never have to be annoyed by the annoying task again.
And it only took so long because you had to look something up, opened Imgur by reflex, and spent twenty minutes clicking next.
Doing it reactifluxily
On the other hand, maybe you're like me. Maybe you thought to yourself, "I can use Flux and React and play with new stuff!".
This version took me two hours to build and at least an hour to get custom domains working with Github pages. Because this needs a domain of its own. Naturally.
But! It makes a great simple example for how to use Flux. The basic kind, at least; I haven't played with all the fancy alternatives yet.
Let's build our utility from the bottom up: start with input fields, add the data store, write the output component, and finally a component that puts it all together.
Fluxy input fields
The utility we're building makes a mailto: link with a subject and a body. That means we need two inputs - an input for the subject, and a textarea for the body.
It takes 19 lines of nicely formatted JSX to build the subject input field:
// src/Subject.jsx

const Subject = React.createClass({
    update: function (event) {
        Actions.update_subject(event.target.value);
    },

    render: function () {
        return (
            <div class="form-group">
                <label for="subject">Subject:</label>
                <input type="text" class="form-control" id="subject" placeholder="Paste your subject line" value={this.props.value} onchange={this.update}>
                <p class="help-block">This will become the prefilled subject line.</p>
            </div>
        );
    }
});
Our component returns a normal input field with a type, a class, and a placeholder. The change event is bound to this.update with onChange, and the value is set to this.props.value.
This combination is where the magic happens.
Whenever a user types into the input field, React calls this.update(), which in turn calls Actions.update_subject. Actions is a global collection of helper functions that trigger events on the dispatcher.
We use Actions because it makes our code shorter. It looks like this:
const Actions = {
  update_subject: function (subject) {
    Dispatcher.dispatch({
      actionType: Constants.UPDATE_SUBJECT,
      subject: subject,
    })
  },

  update_body: function (body) {
    Dispatcher.dispatch({
      actionType: Constants.UPDATE_BODY,
      body: body,
    })
  },
}
Just an object with some functions. When our component calls update_subject, it dispatches a new event on the dispatcher singleton with the correct actionType, and the new value.
We'll look at what happens after dispatching in the next subheading. It involves setting the value property to this.props.value, so don't forget about that.
Great, we've got the Subject component. The Body component looks the same, except it's a textarea:
// src/Body.jsx

const Body = React.createClass({
    update: function (event) {
        Actions.update_body(event.target.value);
    },

    render: function () {
        return (
            <div class="form-group">
                <label for="body">Email Body:</label>
                <textarea id="body" style="{{height:" "300px"}}="" class="form-control" placeholder="Paste your email body here. HTML is fine, we'll convert it to a text-only format." value={this.props.value} onchange={this.update}>                <p className="help-block">This will become the prefilled body.</p>
            </div>
        );
    }
});
See? Almost the same.
We return a textarea, bind the change event to this.update, and set the value with this.props.value.
Now, you might be thinking two things:
- "This is dumb; you're making React look bad by repeating code." Technically, you're right, but these two are semantically different enough to warrant separate components.
- "You're dumb; React 0.14 came out last week and this code looks old." You're right. React 0.14 came out the day after I wrote this code. Deal with it. (⌐■_■)
The Data store
Great, we've built the components for our users to interact with, and we've got onChange events firing actions into the aether.
We're using the default implementation of Flux provided by Facebook. That means we only have to declare the global dispatcher once, and then we never have to worry about it again.
// src/Dispatcher.jsx
const Dispatcher = require("flux").Dispatcher
module.exports = new Dispatcher()
The dispatcher acts as a sort of event broker between components. That makes it easier for components at various levels of the architecture to communicate with the data store, which acts as the single source of truth.
The store consists of three parts:
- Variables/objects with data
- The Store object, which extends EventEmitter
- A register call to the dispatcher that listens for events
We start the data store off with some global variables.
// src/Store.jsx
var subject = "",
  body = ""
We're relying on the way Webpack bundles/compiles JavaScript to keep these from becoming true globals. We're also betting on the fact that require() is referentially transparent and always returns the same instance of the code.
That's a fancy way of saying "Trust me, this works and is okay to do".
The store itself comes out to 20 lines of code. Here's what it looks like:
// src/Store.jsx
const Store = Object.assign(EventEmitter.prototype, {
  getState: function () {
    return {
      subject: subject,
      body: body,
    }
  },
  addChangeListener: function (callback) {
    this.on(CHANGE_EVENT, callback)
  },
  removeChangeListener: function (callback) {
    this.on(CHANGE_EVENT, callback)
  },
  emitChange: function () {
    this.emit(CHANGE_EVENT)
  },
})
We're using Object.assign to extend EventEmitter with four extra functions: getState returns an object with the current values, add- and removeChangeListener add or remove a listener on the change event, and emitChange triggers the change event.
The latter three make our other code easier to write and read.
Finally, we register our store with the dispatcher:
// src/Store.jsx
Dispatcher.register(function (action) {
    switch (action.actionType) {
        case Constants.UPDATE_SUBJECT:
            subject = action.subject;
            Store.emitChange();
            break;
        case Constants.UPDATE_BODY:
            body = action.body;
            Store.emitChange();
            break;
        default:
            // no op
    };
This is no fancier than thing.on('event', callback). The hard work happens inside the dispatcher; we only care to be notified when something happens.
Our callback then takes the actionType property, and decides what to do. In most cases, it will change the value of a store variable and call emitChange.
That's it. Our store is ready. Let's see what happens after emitChange.
The output
We've got the inputs, and we've got the data store as the single source of truth for the entire utility. Now we need a component that will act as the output. Some way for the user to get that mailto: link.
We'll call this component Link because we are engineers and have amazing imaginations.
// src/Link.jsx
const Link = React.createClass({
  build_link: function () {
    var subject = encodeURIComponent(this.props.subject),
      body = encodeURIComponent(
        toMarkdown(this.props.body.replace(/(?:\r\n|\r|\n)/g, "<br />"))
      )
    return "mailto:?subject=" + subject + "&body=" + body
  },
  render: function () {
    return (
      <p>
        You're done! Copy this into your email:{" "}
        <a href={this.build_link()} target="_blank">
          Email this to a friend
        </a>
      </p>
    )
  },
})
The output is some text with a link, which gets its href attribute from the this.build_link method.
Remember the build_link method from earlier? Same function, different name and different way of getting data.
Our vanilla function used arguments to get the raw subject and body; this one gets them from this.props. These are populated as element properties by the parent component. Let me show you how it's done.
The main component puts it all together
We've got the building blocks: the inputs, the data layer, and the output. Now we have to put them all together.
ShareThisEmail is a component with more code than the others, but it's not too bad.
// src/ShareThisEmail.jsx

const ShareThisEmail = React.createClass({
    getInitialState: function () {
        return Store.getState();
    },
    componentDidMount: function () {
        Store.addChangeListener(this._onChange);
    },
    componentWillUnmount: function () {
        Store.removeChangeListener(this._onChange);
    },

    _onChange: function () {
        this.setState(Store.getState());
    }

    render: function () {
        return (
            <div>
                <form className="col-md-8">
                    <Subject value={this.state.subject} />
                    <Body value={this.state.body} />
                    <Link subject={this.state.subject}
                          body={this.state.body} />
                </form>
            </div>
        )
    }
});
This component uses addChangeListener to bind to data store changes when it's mounted into the page, and ensures there are no hanging callbacks before it's unmounted. Basically, subscribes to changes when it starts existing, and unsubscribes before it dies.
In both cases, we use this._onChange as the callback. It uses Store.getState() to naively set ShareThisEmail's internal state to whatever the store says. Not the best approach in all cases, but it works for us.
Once this.setState executes, it triggers a component re-render. This is where React magic kicks in.
On every re-render, we feed the new state into Subject, Body, and Link components as properties. Those components then see the new values in this.props and re-render as needed. A re-render only happens if the actual values are different.
So for example, Link re-renders every time the user types into either subject or body. But subject only re-renders when the subject changes.
Now here's the kicker: because we're using so called controlled components, their values can only change by changing this.props.value. If you forget to close the Flux loop, typing into an input field doesn't change the field.
That part seems kind of bonkers, but it makes sense when you think about it. We're trying to control everything the user sees through an internal data representation. It gives us many benefits, I promise.
So, there you have it. A working app. I only showed you the core parts of the code, so you might want to check out ShareThisEmail's source on Github to learn the details.
Conclusion: do you need flux?
After reading all of that, you might be asking yourself: why did we turn 10 lines of JavaScript into 137, and added a few hundred kilobytes of library payload to our page?
To prove a point.
For this example, Flux doesn't solve any problems. It makes the code harder to follow, increases our payload size, and provides a fertile ground for bugs. More code, more places to make mistakes.
But Flux is a pattern. You can give this code to anyone who knows Flux, and they will know exactly where to look for what. They'll know how things fit together, and they will be able to add more features.
Five months from now, you'll still know what's going on, and you'll be able to fix things.
Adding new features doesn't mean rewriting the whole app. In fact, I added a "Copy to Clipboard" button over the weekend to improve UX and ... well, Flux made it kind of boilerplatey.
When I think of my main gig's production code with its thousands of lines of JavaScript, tens of components, and hundreds of sources of truth, my soul weeps for Flux.
Your mileage may vary.
PS: I'm working on a book about testing React code, send me an email, if you're interested
Thanks to Will Fanguy, Tiffany Morgan, David Bairne, and Coletta Teske for reading draft copies of this article
Filed under: fluxFrontendHTMLJavaScriptjQueryReactTechnical