


The Girl loves her daily cute photos, but she's bored of repeats. What if adding images was easier 🤔
And now it is!
👉 full UI code 👉 full AWS code
full build video 👇
Serverless Handbook for Frontend Engineers – free chapter
Dive modern backend. Understand any backend.
Serverless Handbook taught me high-leveled topics. I don't like recipe courses and these chapters helped me to feel like I'm not a total noob anymore.
The hand-drawn diagrams and high-leveled descriptions gave me the feeling that I don't have any critical "knowledge gaps" anymore.
~ Marek C, engineer
Start with a free chapter and email crash course ❤️
The outline
We've got a lovebox lambda that sends daily random photos from an S3 bucket to an IoT device on my girlfriend's desk. Plastic heart spins, girl opens box, girl sees pic, girl smiles. Swiz gets best boyfriend points.
Works great except I never added more than 5 photos. Uploading to S3 is a pain in the ass 😅
Here's how we're gonna fix that:
- web UI collects images to upload
- fetches a pre-signed S3 upload URL
- uploads image
- repeat until all images uploaded
Amazon S3 uses pre-signed URLs to make file uploads secure. Each URL is good for 1 upload. Specific file type, expires fast, pre-defined file name.

The AWS Lambda
The Lambda that generates a new pre-signed URL follows the REST API pattern. GraphQL would be overkill because we're fetching 1 value.
We add it in serverless.yml
# serverless.yml
functions:
  # ...

  presignedUrl:
    handler: dist/presignedUrl.getUrl
    events:
      - http:
          path: presignedurl
          method: GET
          cors: true
presignedUrl calls the getUrl method when you hit the /presignedurl path with a GET request.
Prep params
The method itself starts by prepping params for the S3 API.
// src/presignedUrl.ts

export async function getUrl(event: APIGatewayEvent) {
    const fileType = event.queryStringParameters?.filetype;

    // verify file type was passed
    if (!fileType?.startsWith("image")) {
        return {
            statusCode: 400,
            body: JSON.stringify({ error: "Please upload an image" }),
        };
    }

    // image/png -> png
    const extension = fileType.split("/")[1];

    const imageId = uuidv4();
    const filename = `${imageId}.${extension}`;
    const expireSeconds = 60 * 5;
    const readUrl = `https://lovebox-stash.s3.amazonaws.com/${filename}`;
We grab the filetype param from the querystring and verify it exists. We'll need it to generate the file name and tell S3 what type of file to expect.
Then we generate a new UUID for the image name, define a 5min expiration, and create a URL our client can use to display the image after upload.
Generate upload URL
// src/presignedUrl.ts

export async function getUrl(event: APIGatewayEvent) {
  // ...

  const uploadUrl = s3.getSignedUrl("putObject", {
    Bucket: "lovebox-stash",
    Key: filename,
    ContentType: fileType,
    Expires: expireSeconds,
  })

  const headers = {
    "Access-Control-Allow-Origin": "*",
    "Access-Control-Allow-Credentials": true,
    "access-control-allow-methods": "GET",
  }

  return {
    statusCode: 200,
    headers,
    body: JSON.stringify({
      uploadUrl,
      readUrl,
      imageId,
    }),
  }
}
When everything's ready, we call s3.getSignedUrl to create a new upload URL. It works for 5 minutes on our exact upload. Once used, it's done.
We return a bunch of CORS headers to make this callable from the browser and add the generated url.
You get an API response like this:
{
  "uploadUrl": "https://lovebox-stash.s3.amazonaws.com/6b27de0f-f719-4792-a8ec-f4c26a0f5d7d.png?AWSAccessKeyId=ASIAVGA6PM7APGWCNIXD&Content-Type=image%2Fpng&Expires=1618934335&Signature=PgBtnH%2BJ6QswFHY4vCvQ0wJOWuE%3D&x-amz-security-token=IQoJb3JpZ2luX2VjECgaCXVzLWVhc3QtMSJHMEUCIGpLnl1QR0avgrz%2BCch8H0Sr%2FTIHNEbUSU3BOQICAQQkAiEAxiFrEwKvv6vq%2BLNYTFzylSP6YqqOQWaLr0Y2uvsYOowq5wEIkf%2F%2F%2F%2F%2F%2F%2F%2F%2F%2FARAAGgwzNTY1NDYyMDk3MjgiDHp3IQG1N95uWNEVjiq7AQ3fYHQkBvv%2BeqPM7sK0AM437xIXgOHFqhRW7u1JDhzKr363EPyjN1xaErhBIso058PtjpGTGN2mBUKWysaVvJGPBfCriUls1upJ%2BM9MgNeYuEhIyU%2BBmrAEq91M4WwH%2BjW%2FIZKrAJfeiU8kAjJVMdJSD2GCEDUVUTFgTgoEMYFrGQxidJbvTR3mg6eLajbENuwqb7g7guePhFKs1AqzI%2FLAaZxAfj2ToGslFE17GaagvEadGDw2XWl%2Ff10wkvL7gwY64AGfSFcLkWZlOP2MyHflJaCPhsFP2%2BZCEPtiE5CSlkmGYWIC7CbQcKj0bhIUXHOBzH%2BvV1JGVzfKXLRbU7WXEvYWk5SqfT%2FrAxphDTEYoP28RD10BWU2o8JEH%2FWG6YINVeVFCAl%2FuviyL3ysDhB%2FjMX6Vpjte1pdUmsmmMode%2FeExDCZtp5hTsUnLFbMFgloldnvYadaERN5gYZlC9sEtsKhacsaUkwUPDVtQJv7XPj0Zkf6hFVfKH0cgOCGFhy%2BUoBDZ2r0%2B3Xh%2Bs1oSnTOMlXn8eIzVeMPQRHB%2BEmF3J6nug%3D%3D",
  "readUrl": "https://lovebox-stash.s3.amazonaws.com/6b27de0f-f719-4792-a8ec-f4c26a0f5d7d.png",
  "imageId": "6b27de0f-f719-4792-a8ec-f4c26a0f5d7d"
}
The file is private so maybe the readUrl isn't useful 🤔
The NextJS UI
NextJS made it quick to spin up a new React app.
I was hoping to leverage server-side-generation to fetch the upload URL, but the UX wasn't great. You need a new URL for every file to enable multi-file upload and the upload works better when you know the file type.
We cleaned out the default homepage and added a <LoveboxDropzone /> component.
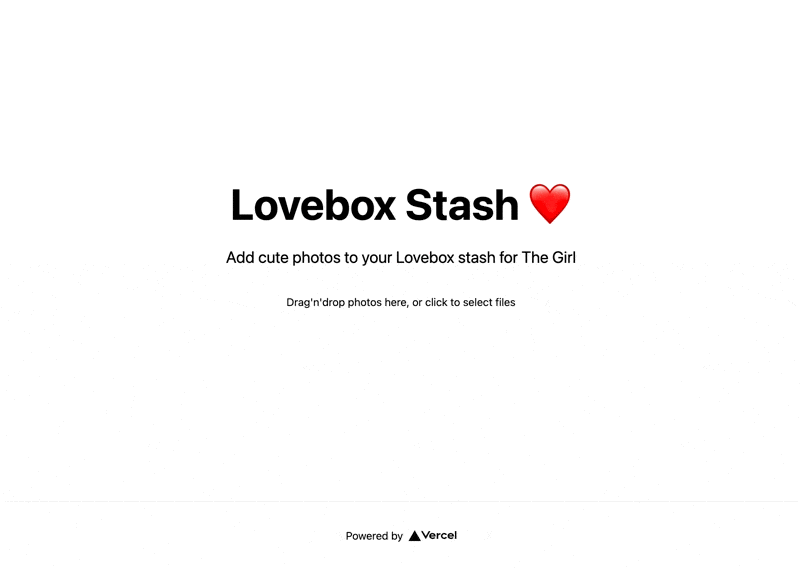
// pages/index.js

export default function Home() {
    return (
        <div className={styles.container}>

            <main className={styles.main}>
                <h1 className={styles.title}>Lovebox Stash ❤️</h1>

                <p className={styles.description}>
                    Add cute photos to your Lovebox stash for The Girl
                </p>

                <LoveboxDropzone />
            </main>
LoveboxDropzone handles the upload UI and logic.
LoveboxDropzone
We used react-dropzone to handle the intricacies of file uploads and drag-n-drop. Works great 👌
Copied the core code from docs:
// components/LoveboxDropzone.js

export function LoveboxDropzone() {
  const onDrop = useCallback(async (acceptedFiles) => {
    // handle file upload
  }, [])

  const { getRootProps, getInputProps, isDragActive } = useDropzone({
    onDrop,
  })

  return (
    <div {...getRootProps()}>
      <input {...getInputProps()} />
      {isDragActive ? (
        <p>Drop your photos here ...</p>
      ) : (
        <p>Drag'n'drop photos here, or click to select files</p>
      )}
    </div>
  )
}
react-dropzone gives you a useDropzone hook that returns the props you need to render. You give it a callback to handle files.
Ours looks like this:
const onDrop = useCallback(async (acceptedFiles) => {
  setUploading(true)

  await Promise.all(acceptedFiles.map(uploadFile))

  setUploading(false)
}, [])
useCallback ensures a stable function reference – avoids re-renders. setUploading(true/false) shows a spinner from react-spinner so users know an upload is in progress.
await Promise.all runs each file upload in parallel and waits for them all to finish. Makes the UX faster when you upload a bunch 😊
The file upload
The uploadFile function handles each individual file.
// components/LoveboxDropzone.js

async function uploadFile(file) {
  const [{ uploadUrl }, data] = await Promise.all([
    getPresignedUploadUrl(file),
    readFile(file),
  ])

  const res = await fetch(uploadUrl, {
    method: "PUT",
    body: data,
    headers: {
      // file type has to match presigned url type
      "Content-Type": file.type,
    },
  })

  if (res.ok) {
    console.log(await res.text())
  } else {
    console.log("ERROR")
    console.log(res)
  }
}
Uploads happen in 3 stages:
- Fetch the pre-signed upload url
- Read file as a binary blob
- Upload to S3 via upload url
We do 1 and 2 in parallel with Promise.all to improve UX.
You'll notice there's no error handling. If something goes wrong, the user will never know. Spinner spins forever.
That's okay for a quick hack. ✌️
fetch pre-signed upload url
We've got an AWS Lambda that works as a REST API and generates upload urls on demand. We can use a fetch() request. No need to get fancy.
async function getPresignedUploadUrl(file) {
  const presignedUrl = await fetch(`${URL}?filetype=${file.type}`).then((res) =>
    res.json()
  )

  return presignedUrl
}
Lambda URL is a constant (should be an ENV var), add filetype to query params, fetch. Parsing json() throws an error if the request fails. That's good enough.
Using React Query would be overkill because we don't need a caching layer. Each response only works once.
read file as a binary blob
Modern browsers offer a full-on file API. You have File objects with meta data and you can read their contents into memory with the FileReader.
A lot like a filesystem except it runs in memory.
async function readFile(file) {
  return new Promise((resolve, reject) => {
    const reader = new FileReader()

    reader.onabort = () => reject()
    reader.onerror = () => reject()
    reader.onload = () => resolve(reader.result)

    reader.readAsArrayBuffer(file)
  })
}
Unfortunately the FileReader API predates promises. We tack a custom promise on top of its event-based interface.
onload resolves the promise with data, onabort and onerror reject. In async/await land this translates to a returned value and errors.
upload to S3 via upload url
The final upload is another fetch() call. React Query would again be overkill because we're making unique requests.
const res = await fetch(uploadUrl, {
  method: "PUT",
  body: data,
  headers: {
    // file type has to match presigned url type
    "Content-Type": file.type,
  },
})
Make a PUT request to the uploadUrl, push file data into the body, set Content-Type to the file type.
And it works 🎉
Works like a charm. Uploaded 12 images at once from my phone 🤘
Works great on mobile which is exactly what I needed 👉 a quick way to add photos on the go.
— Swizec Teller (@Swizec) April 20, 2021
Multiple file upload do smooth 👌 pic.twitter.com/tGufnF8uCl
Time to go make some memories.
Cheers,
~Swizec
PS: you can learn more about serverless in general from Serverless Handbook
Continue reading about Serverless file upload to S3 with NextJS and AWS Lambda – CodeWithSwiz 27
Semantically similar articles hand-picked by GPT-4
- Send daily random photos from an S3 bucket using AWS Lambda – CodeWithSwiz 25
- What happens when you push AWS credentials to GitHub
- Can you automate love?
- Reverse engineer a GraphQL API to automate love notes – CodeWithSwiz 24
- Why serverless fits side-projects perfectly
Want to dive into serverless? Not sure where to begin?
Serverless Handbook was designed for people like you getting into backend programming.
360 pages, 19 chapters, 6 full projects, hand-drawn diagrams, beautiful chapter art, best-looking cover in tech. ✌️

Learn how to choose the right database, write cloud functions, think about scalability, gain the architecture mindsets for robust systems, and more.
Leave your email to start with a free chapter and email crash course 👇
Serverless Handbook for Frontend Engineers – free chapter
Dive modern backend. Understand any backend.
Serverless Handbook taught me high-leveled topics. I don't like recipe courses and these chapters helped me to feel like I'm not a total noob anymore.
The hand-drawn diagrams and high-leveled descriptions gave me the feeling that I don't have any critical "knowledge gaps" anymore.
~ Marek C, engineer
Start with a free chapter and email crash course ❤️

Have a burning question that you think I can answer? Hit me up on twitter and I'll do my best.
Who am I and who do I help? I'm Swizec Teller and I turn coders into engineers with "Raw and honest from the heart!" writing. No bullshit. Real insights into the career and skills of a modern software engineer.
Want to become a true senior engineer? Take ownership, have autonomy, and be a force multiplier on your team. The Senior Engineer Mindset ebook can help 👉 swizec.com/senior-mindset. These are the shifts in mindset that unlocked my career.
Curious about Serverless and the modern backend? Check out Serverless Handbook, for frontend engineers 👉 ServerlessHandbook.dev
Want to Stop copy pasting D3 examples and create data visualizations of your own? Learn how to build scalable dataviz React components your whole team can understand with React for Data Visualization
Want to get my best emails on JavaScript, React, Serverless, Fullstack Web, or Indie Hacking? Check out swizec.com/collections
Did someone amazing share this letter with you? Wonderful! You can sign up for my weekly letters for software engineers on their path to greatness, here: swizec.com/blog
Want to brush up on your modern JavaScript syntax? Check out my interactive cheatsheet: es6cheatsheet.com
By the way, just in case no one has told you it yet today: I love and appreciate you for who you are ❤️