


This is a Livecoding Recap – an almost-weekly post about interesting things discovered while livecoding. Usually shorter than 500 words. Often with pictures. Livecoding happens almost every Sunday at 2pm PDT on multiple channels. You should subscribe to my Youtube channel to catch me live.
It worked! We got two browsers on different machines talking to each other without a server.
Well… after the initial handshake. You still need a server for that.
OMG IT WORKS! I got two browsers to talk to each other without a server
— Swizec Teller (@Swizec) May 14, 2018
Well ... a server is used for the initial handshake. BUT THEN NO SERVER #WebRTC
Article coming soon pic.twitter.com/LRWVt4BhV8
That was a fun weekend. Two livecoding sessions. Finally got it working late at night when the cameras weren't rolling. I am nowhere near having it working in time for a true blockchain demo for my WeAreDevelopers talk this Friday. 😅
You can try it out here. Open that link in two browsers, possibly on different machines.
You might have to try a couple of times, it's a little finicky. 🤨
Here's how it works 👇
How to use WebRTC to connect browsers on different devices

You can use WebRTC to make browsers talk to each other directly without a server. But because there's no service discovery, you need a signaling server so browsers can find each other.
The flow goes like this:
- Client 1 says hi to the server and registers
- Client 2 says hi to the server and registers
- Server holds list of identifiers (usernames)
- Client 1 tells server to call Client 2
- Server tells Client 2 there's a call
- Client 2 answers the call
- Client 1 and Client 2 are now talking directly
We followed this WebRTC chat example from MDN to model our code.
Signaling WebSocket server
Signaling is the handshake process between two browsers. Our implementation uses WebSockets to do that.
The server part is the same as the MDN example. Pure copy pasta.
We made some changes to make it work with now.sh. Namely, we removed all SSL stuff. Zeit wraps our servers in a secure SSL server that then talks to our actual server via an unencrypted connection.
That was a painful gotcha to learn.
WebSockets don't work in modern browsers without SSL. And they don't work with self-signed certificates unless you're running localhost. If you want browsers that are not on your machine to talk, you're gonna have to ensure a real SSL cert.
Easiest way is to deploy on now.
Connecting to the signaling server
Talking to the server happens via WebSockets with a 40 line helper class. Instantiate the class, make a connection, listen for messages.

We create a new WebSocket in connectToSocket, add some callbacks, and hope for the best. The onmessage listener allows us to add additional message listeners later via the messageListeners array.
sendToServer lets us send a JSON object to our server, and addMsgListener lets us add a new message listener. We'll use this to wire up our PeerConnection helper to our server.
Establishing a peer connection
Learning our lesson from WebRTC part 1, we split our RTCPeerConnection stuff into a helper class.
It's about 148 lines and handles the whole lifecycle. We talked about the code before, so here's a recap 👇
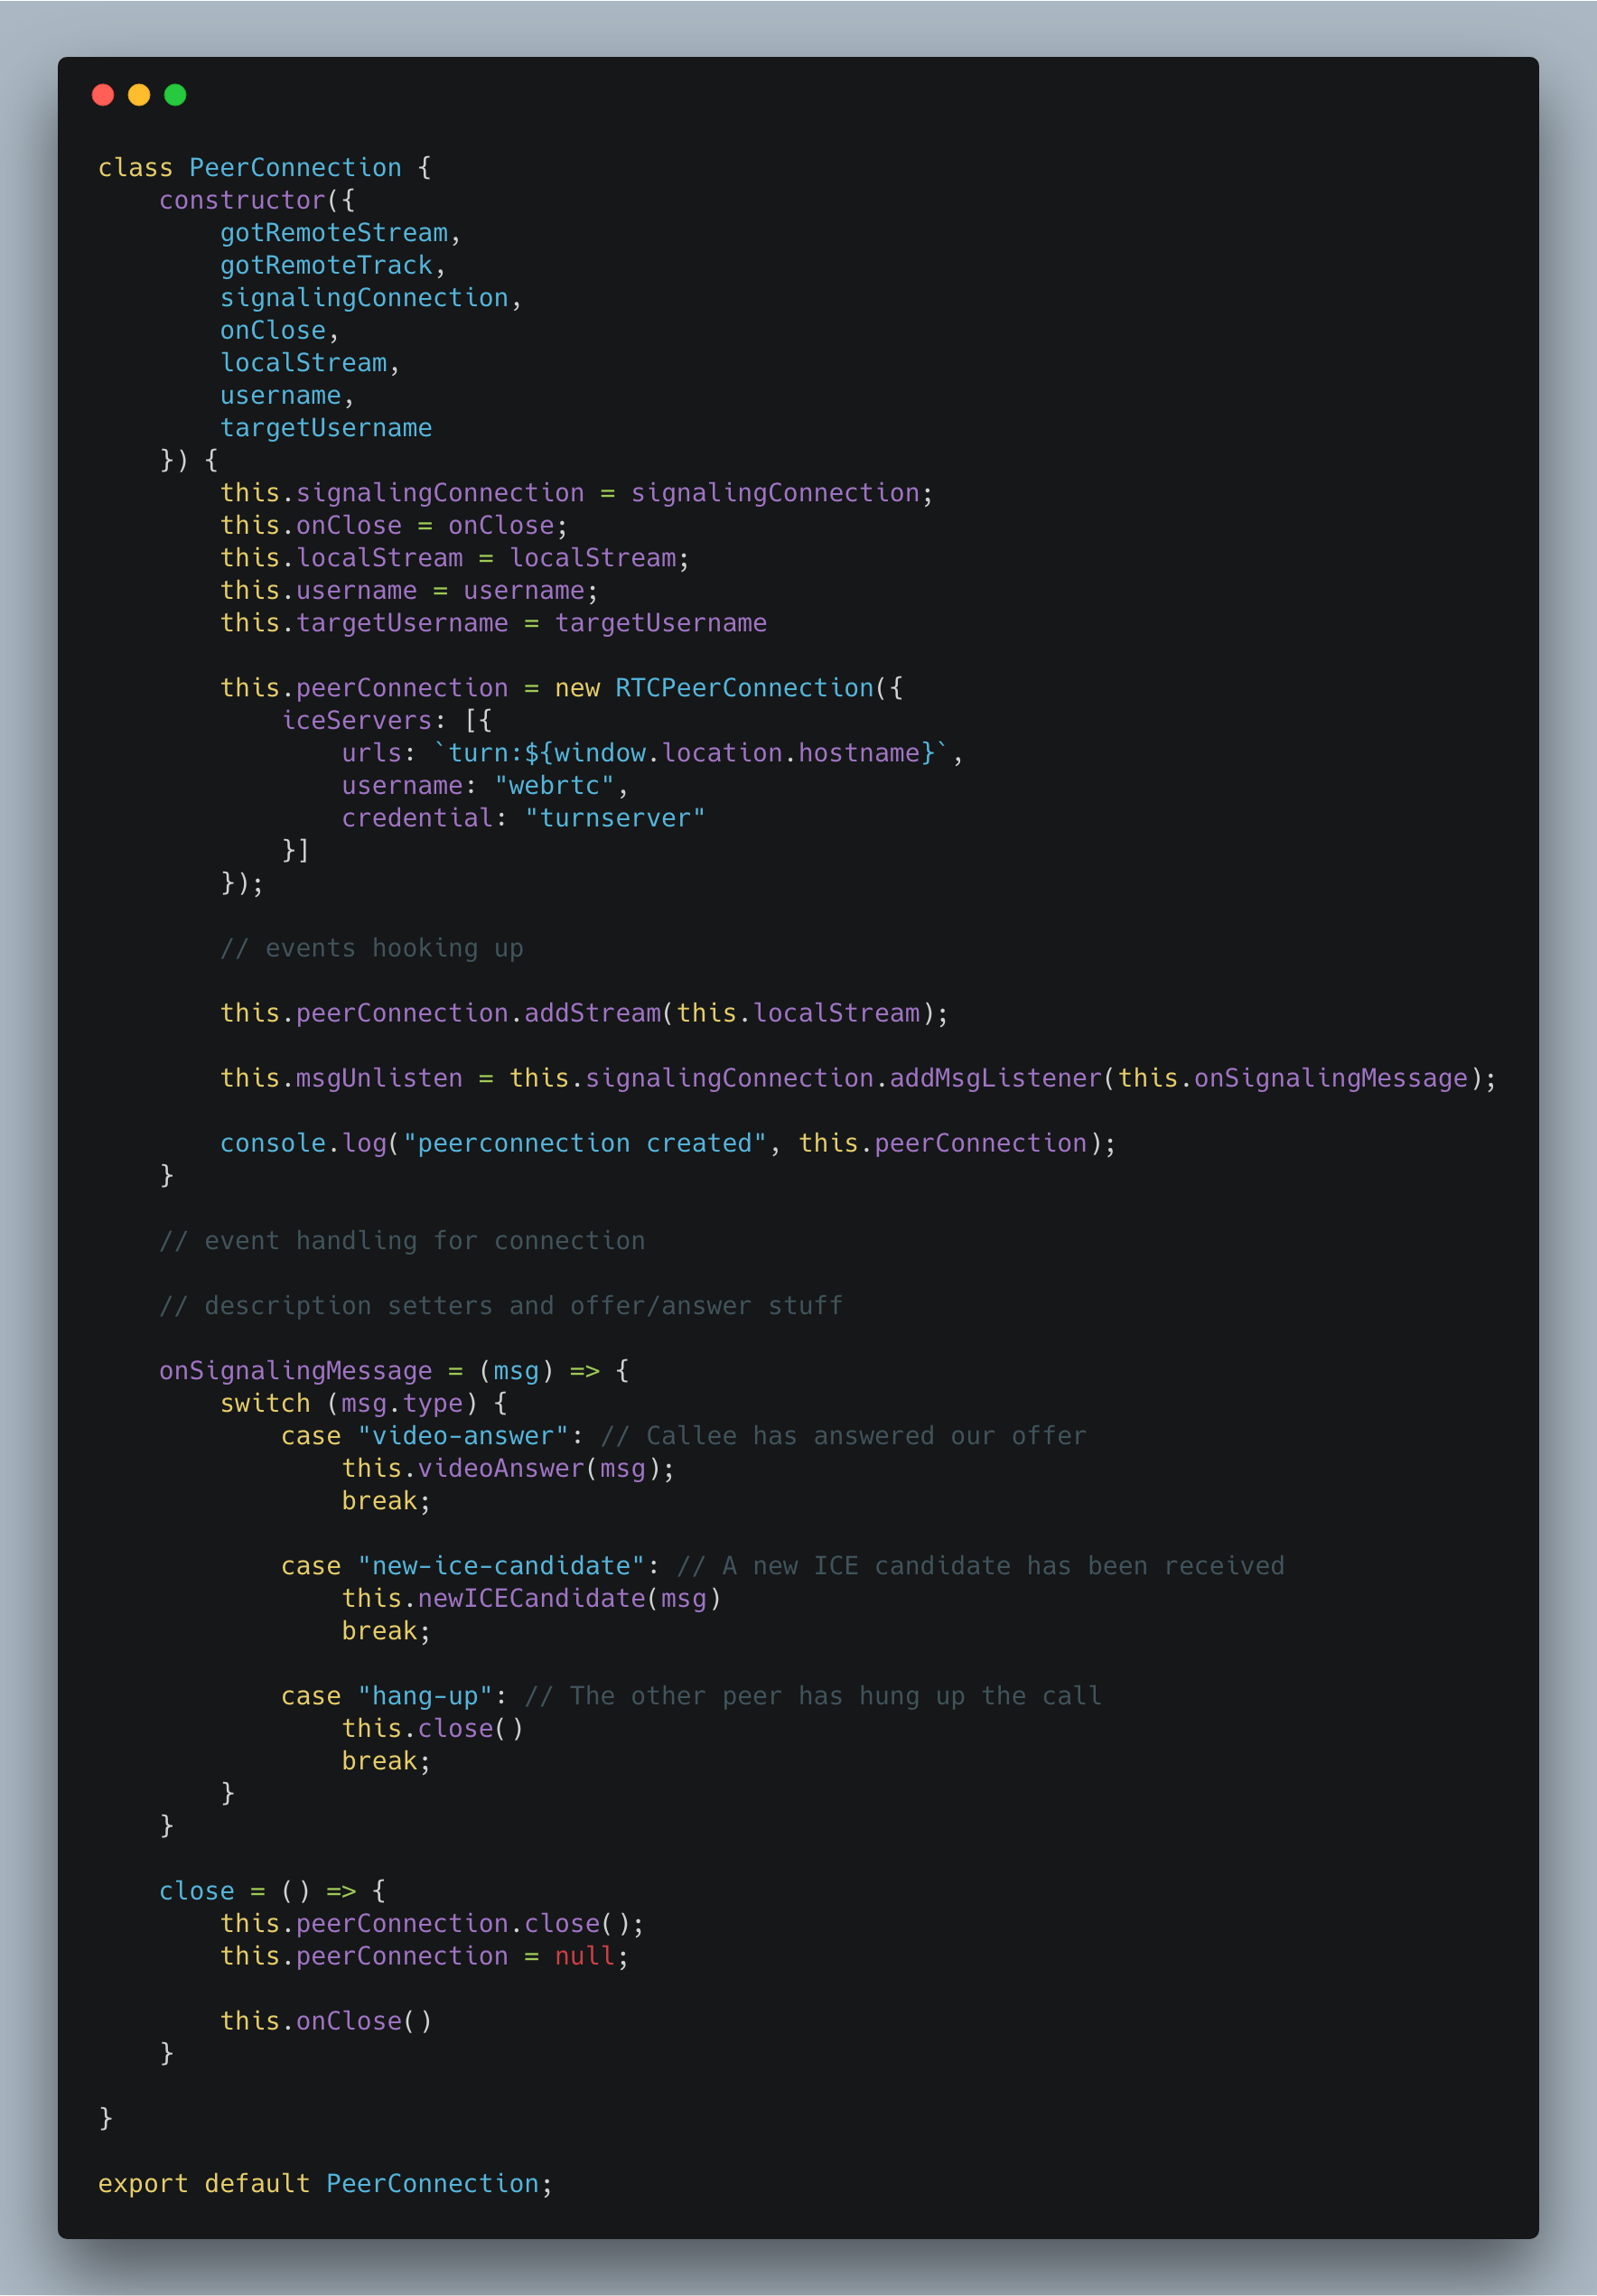
constructor sets a bunch of instance vars, sets up a new RTCPeerConnection object, tells it which iceServers to use, connects local event listeners, starts listening for messages on our signaling server, and adds our media stream to the peerConnection.
The next step is handleICECandidate, interactive connectivity establishment, which triggers when a new connection is attempted. It pings our signaling server and says "Yo, new ice candidate here".
handleICECandidateEvent = (event) => {
  if (event.candidate) {
    this.signalingConnection.sendToServer({
      type: "new-ice-candidate",
      target: this.targetUsername,
      candidate: event.candidate,
    });
  }
};
After that, we’ve got the handleNegotiationNeededEvent, which is called when RTCPeerConnection says some negotiation needs to happen. I don't know what makes it say that.
But the function creates a new connection offer, updates the local SDP description, and tells our signaling server that we're trying to call someone.
handleNegotiationNeededEvent = () => {
  const { username, targetUsername } = this;
  this.peerConnection
    .createOffer()
    .then((offer) => this.peerConnection.setLocalDescription(offer))
    .then(() =>
      this.signalingConnection.sendToServer({
        name: username,
        target: targetUsername,
        type: "video-offer",
        sdp: this.peerConnection.localDescription,
      })
    )
    .catch(console.error);
};
Handling signaling messages
Then we have the fun stuff: handling messages from our signaling server.
onSignalingMessage = (msg) => {
  switch (msg.type) {
    case "video-answer": // Callee has answered our offer
      this.videoAnswer(msg);
      break;

    case "new-ice-candidate": // A new ICE candidate has been received
      this.newICECandidate(msg);
      break;

    case "hang-up": // The other peer has hung up the call
      this.close();
      break;
  }
};
When a message comes in, we can do a couple different things. Set ourselves up as the answer party, add a new candidate to our connection, or close.
Those functions are thin wrappers over WebRTC APIs.
videoAnswer = ({ sdp }) => {
  this.peerConnection
    .setRemoteDescription(new RTCSessionDescription(sdp))
    .catch(console.error);
};

newICECandidate = ({ candidate }) => {
  this.peerConnection.addIceCandidate(new RTCIceCandidate(candidate));
};

close = () => {
  this.peerConnection.close();
  this.peerConnection = null;

  this.onClose();
};
That's our PeerConnection object. In theory, we could instantiate many of them to connect to multiple remote machines at the same time.
That will be a fun experiment.

Putting it all together
Holding it all together is our WebRTCPeerConnectionWithServer React component. It renders the UI, instantiates both helper classes from above, and handles the user clicking on buttons to drive the process.
You can see the whole file on GitHub.
Here are the salient parts. 👇
call = (user) => {
  this.setState({
    targetUsername: user,
  });
  this.createPeerConnection();
};

hangUp = () => {
  this.signalingConnection.sendToServer({
    name: this.state.username,
    target: this.state.targetUsername,
    type: "hang-up",
  });
  this.peerConnection.close();
};

createPeerConnection = () => {
  if (this.peerConnection) return;

  this.peerConnection = new PeerConnection({
    gotRemoteStream: this.gotRemoteStream,
    gotRemoteTrack: this.gotRemoteTrack,
    signalingConnection: this.signalingConnection,
    onClose: this.closeVideoCall,
    localStream: this.state.localStream,
    username: this.state.username,
    targetUsername: this.state.targetUsername,
  });
};

closeVideoCall = () => {
  this.remoteVideoRef.current.srcObject &&
    this.remoteVideoRef.current.srcObject
      .getTracks()
      .forEach((track) => track.stop());
  this.remoteVideoRef.current.src = null;

  this.setState({
    targetUsername: null,
    callDisabled: false,
  });
};
call is where the fun starts. Saves whom we're calling to state and creates a peer connection.
createPeerConnection passes all the things into our PeerConnection class.
hangUp and closeVideoCall work together to finish our call. We need both because one is user-driven and the other is called when hangup comes from the other side.
One last thing
There's one message from the signaling server we have to handle in the glue area: An offer for a call.
    case "video-offer": // Invitation and offer to chat
        this.createPeerConnection();
        this.peerConnection.videoOffer(msg);
        break;
When the server tells us someone wants to connect, we have to create a new PeerConnection object on our client and handle the offer. Handling the offer means setting a remote SDP description and sending an answer.
videoOffer = ({ sdp }) => {
  const { username, targetUsername } = this;

  this.peerConnection
    .setRemoteDescription(new RTCSessionDescription(sdp))
    .then(() => this.peerConnection.createAnswer())
    .then((answer) => {
      return this.peerConnection.setLocalDescription(answer);
    })
    .then(() => {
      this.signalingConnection.sendToServer({
        name: username,
        targetUsername: targetUsername,
        type: "video-answer",
        sdp: this.peerConnection.localDescription,
      });
    })
    .catch(console.error);
};
👌
And then it works 🤞
If all the stars align, you can now have a call between 2 browsers on different machines without talking to the server again.
OMG IT WORKS! I got two browsers to talk to each other without a server
— Swizec Teller (@Swizec) May 14, 2018
Well ... a server is used for the initial handshake. BUT THEN NO SERVER #WebRTC
Article coming soon pic.twitter.com/LRWVt4BhV8
Continue reading about Learning WebRTC peer-to-peer communication, part 2 – connecting 2 browsers on different devices
Semantically similar articles hand-picked by GPT-4
- Learning WebRTC peer-to-peer communication, part 1
- Towards a WebRTC mesh network with RTCDataChannel
- Livecoding Recap #44: Dipping my toes in AR.js
- Livecoding #35 - A New Site for reactd3js.com
- Livecoding recap: Blockchain-redux now shares blocks between clients in real-time
Learned something new?
Read more Software Engineering Lessons from Production
I write articles with real insight into the career and skills of a modern software engineer. "Raw and honest from the heart!" as one reader described them. Fueled by lessons learned over 20 years of building production code for side-projects, small businesses, and hyper growth startups. Both successful and not.
Subscribe below 👇
Software Engineering Lessons from Production
Join Swizec's Newsletter and get insightful emails 💌 on mindsets, tactics, and technical skills for your career. Real lessons from building production software. No bullshit.
"Man, love your simple writing! Yours is the only newsletter I open and only blog that I give a fuck to read & scroll till the end. And wow always take away lessons with me. Inspiring! And very relatable. 👌"

Have a burning question that you think I can answer? Hit me up on twitter and I'll do my best.
Who am I and who do I help? I'm Swizec Teller and I turn coders into engineers with "Raw and honest from the heart!" writing. No bullshit. Real insights into the career and skills of a modern software engineer.
Want to become a true senior engineer? Take ownership, have autonomy, and be a force multiplier on your team. The Senior Engineer Mindset ebook can help 👉 swizec.com/senior-mindset. These are the shifts in mindset that unlocked my career.
Curious about Serverless and the modern backend? Check out Serverless Handbook, for frontend engineers 👉 ServerlessHandbook.dev
Want to Stop copy pasting D3 examples and create data visualizations of your own? Learn how to build scalable dataviz React components your whole team can understand with React for Data Visualization
Want to get my best emails on JavaScript, React, Serverless, Fullstack Web, or Indie Hacking? Check out swizec.com/collections
Did someone amazing share this letter with you? Wonderful! You can sign up for my weekly letters for software engineers on their path to greatness, here: swizec.com/blog
Want to brush up on your modern JavaScript syntax? Check out my interactive cheatsheet: es6cheatsheet.com
By the way, just in case no one has told you it yet today: I love and appreciate you for who you are ❤️