


One of d3’s biggest selling points is the general update pattern. Add some function calls and voila – animated visualization with transitions.
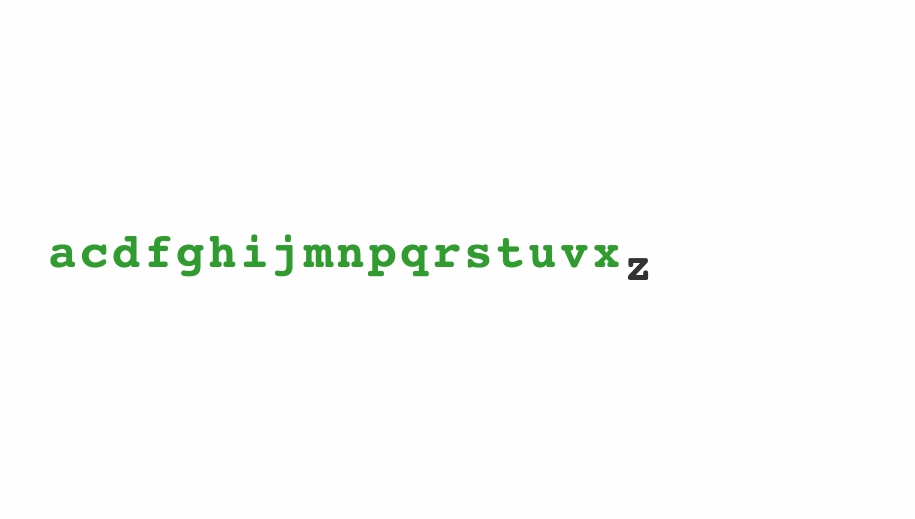
You can see it in action in Mike Bostock’s General Update Pattern 4.0 where he animates an alphabet. Update the alphabet and old letters transition out, new letters transition in, updated letters transition into a new position. It works like magic.
D3 always works like magic …
.@Swizec also with React you're not *binding the data*. you're just iterating over the data and creating SVG elements. It's not data-driven
— Luca Matteis (@lmatteis) April 16, 2016
You totally can achieve the same result with React. Yes, even if you use React to render SVG. Yes, you can use d3’s powerful transitions API too.
The React version is easier to understand, too. Keep reading and you’ll see why.
Enter update exit transitions in React
We’re going to build that same animated alphabet. To keep things short, this tutorial focuses on the alphabet itself and ignores all the config and parent components.
The code is based on React 15 and D3 4.0.0-alpha.29. Don’t worry, it works with the stable version of D3. I’ll explain the subtle differences.
To make an animated alphabet, we need two components:
Alphabet, which creates random lists of letters every 1.5 seconds, then maps through them to renderLettercomponentsLetter, which renders an SVG text element, and takes care of its enter/update/exit transitions
We’re going to use React to render SVG elements, and d3 for transitions, intervals, and some maths.
You can see the full code on GitHub here.
The Alphabet component
The Alphabet component holds the current list of letters in state and renders a collection of Letter components in a loop.
We start with a skeleton like this:
// src/components/Alphabet/index.jsx

import React, { Component } from "react";
import ReactTransitionGroup from "react-addons-transition-group";
import d3 from "d3";

require("./style.less");

import Letter from "./Letter";

class Alphabet extends Component {
  static letters = "abcdefghijklmnopqrstuvwxyz".split("");
  state = { alphabet: [] };

  componentWillMount() {
    // starts an interval to update alphabet
  }

  render() {
    // spits out svg elements
  }
}

export default Alphabet;
We import our dependencies, add some styling, and define the Alphabet component. It holds a list of available letters in a static letters property, and an empty alphabet in component state. We’ll need a componentWillMount and a render method as well.
Sidenote: That require('style.less') isn’t key to this tutorial. I’m not a fan of inline styling, so I like to add less compilation to Webpack and include stylesheets like this.
To showcase enter-update-exit transitions, we want to create a new alphabet every couple of seconds. The best place to do that is in componentWillMount:
// src/components/Alphabet/index.jsx

    componentWillMount() {
        d3.interval(() => this.setState({
           alphabet: d3.shuffle(Alphabet.letters)
                       .slice(0, Math.floor(Math.random() * Alphabet.letters.length))
                       .sort()
        }), 1500);
    }
We use d3.interval( //.., 1500) to call a function every 1.5 seconds. It’s the same as setInterval, but friendlier to batteries and CPUs. On each period, we shuffle the available letters, slice out a random amount, sort them, then update component state with setState.
This ensures our alphabet is both random and in alphabetical order.
Starting the interval in componentWillMount ensures it only runs when the component is on the page, and that everything’s ready by the time our component renders. It’s good practice to explicitly stop these sorts of intervals in componentWillUnmount.
Our declarative transitions magic starts in the render method.
// src/components/Alphabet/index.jsx

    render() {
        let transform = `translate(${this.props.x}, ${this.props.y})`;

        return (
            <g transform={transform}>
                <reacttransitiongroup component="g">
                    {this.state.alphabet.map((d, i) => (
                        <letter d={d} i={i} key={`letter-${d}`}>
                     ))}
                </letter></reacttransitiongroup>
            </g>
        );
    }
We start with an SVG transformation that moves our alphabet into the specified (x, y) position, then define a ReactTransitionGroup and map through this.state.alphabet to render a collection of Letter components. Each Letter gets its current text – d – and index – i. We have to define the key attribute based on the letter – d.
The Alphabet component assumes the parent component renders it inside an <svg> tag.
The key property
The key property is how React identifies which component is which. You’re gonna have a bad time if you pick wrong. Trust me. I spent many hours debugging and contorting and writing workarounds before I realized that basing the key on the index was a Bad Move™. Obviously, you want the letter to stay constant in each component and the index to change.
That’s how x-axis transitions work. You’re moving the letter into a specific place in the alphabet. You’ll see what I mean in a bit.
ReactTransitionGroup
Wrapping our list of Letters in ReactTransitionGroup lets us do our magic. This is a low-level API from React add-ons, which expands our kingdom of component lifecycle hooks.
In addition to knowing when the component mounts, updates, and unmount, we get access to componentWillEnter, componentWillLeave, and a few others. Notice something familiar?
componentWillEnter is the same as d3’s .enter(), componentWillLeave is the same as d3’s .exit(), and componentWillUpdate is the same as d3’s .update().
“The same” is a strong concept – they’re analogous. The key difference is that d3’s hooks operate on entire selections – groups of components – while React’s lifecycle hooks operate on each component individually. In d3, an overlord is dictating what happens; in React, each component knows what to do.
That makes React code easier to understand. I think. ¯\_(ツ)_/¯
ReactTransitionGroup gives us even more hooks, but these are what we need. It’s nice that in both componentWillEnter and componentWillLeave we can use the callback to explicitly say “The transition is done. React, back to you”.
My thanks to Michelle Tilley for writing about ReactTransitionGroup on StackOverflow.
The Letter component
Now we’re ready for the real magic – a component that can transition itself into and out of a visualization… without bothering anyone else or confusing React.
The basic skeleton of our Letter component looks like this:
// src/components/Alphabet/Letter.jsx

import React, { Component } from 'react';
import ReactDOM from 'react-dom';
import d3 from 'd3';

class Letter extends Component {
    state = {
        y: -60,
        x: 0,
        className: 'enter',
        fillOpacity: 1e-6
    }
    transition = d3.transition()
                   .duration(750)
                   .ease(d3.easeCubicInOut);

    componentWillEnter(callback) {
        // start enter transition, then callback()
    }

    componentWillLeave(callback) {
        // start exit transition, then callback()
    }

    componentWillReceiveProps(nextProps) {
        if (this.props.i != nextProps.i) {
           // start update transition
        }
    }

    render() {
       // spit out a <text> element
    }
};

export default Letter;</text>
We start with some imports, and define a Letter component with a default state and a default transition. Yes, it feels weird to use state for coordinates, class name, and styling, but the component needs to change them sometimes. As far as I know, components can’t change their own props.
Defining a default transition is a d3 v4 trick. It saves us some typing. With the stable version of d3, you’d define this duration and easing function on each transition.
All of the magic values – default/final y coordinate, transition properties, etc. – are good candidates for props. That would make Alphabet more flexible, but add unnecessary complexity for this tutorial.
componentWillEnter
We start with the enter transition in componentWillEnter.
// src/components/Alphabet/Letter.jsx

    componentWillEnter(callback) {
        let node = d3.select(ReactDOM.findDOMNode(this));

        this.setState({x: this.props.i*32});

        node.transition(this.transition)
            .attr('y', 0)
            .style('fill-opacity', 1)
            .on('end', () => {
                this.setState({y: 0, fillOpacity: 1});
                callback()
            });
    }
We use reactDOM.findDOMNode to get our DOM node and use d3.select to turn it into a d3 selection. Now we can do any and all d3 magic.
Then we update this.state.x the current index and letter width. The width is a value that we Just Know™.
We keep our letter’s x coordinate in this.state to avoid jumpiness. The i prop updates on each render, but we want to transition into the new position slowly. You’ll see how that works in the componentWillReceiveProps section.
At this point our component is invisible and 60 pixels above the baseline. That’s because of the default values for fillOpacity and y that we set earlier.
To animate our component moving down and becoming visible, we use a d3 transition.
We use node.transition(this.transition) to start a new transition using the default settings from earlier. In d3 v3, we’d have to define a duration and easing function here manually.
Then we define what/how should change with .attr and .style. This operates directly on the DOM and doesn’t tell React about the changes.
We can sync React’s imagination with reality in a “transition is over” callback using .on('end'. We use setState to update component state, and trigger the main callback. React now knows this letter is done appearing.
In d3 v3, you’d use .each('end' to define the callback.
componentWillLeave
The exit transition goes in componentWillLeave and follows the same principle, except in reverse. It looks like this:
// src/components/Alphabet/Letter.jsx

    componentWillLeave(callback) {
        let node = d3.select(ReactDOM.findDOMNode(this));

        this.setState({className: 'exit'});

        node.transition(this.transition)
            .attr('y', 60)
            .style('fill-opacity', 1e-6)
            .on('end', () => {
                this.setState({y: 60, fillOpacity: 1e-6});
                callback()
            });
    }
This time, we update state to change the className instead of x. That’s because x doesn’t change.
The exit transition itself is an inverse of the enter transition. An exiting letter moves further down and becomes invisible. Once the transition is over, we update state for consistency’s sake, and we tell React it can remove the component.
On second though, we might not need to update state in this case. The component goes bye-bye anyway…
componentWillReceiveProps
The update transition goes into componentWillReceiveProps like this:
// src/components/Alphabet/Letter.jsx

    componentWillReceiveProps(nextProps) {
        if (this.props.i != nextProps.i) {
            let node = d3.select(ReactDOM.findDOMNode(this));

            this.setState({className: 'update'});

            node.transition(this.transition)
                .attr('x', nextProps.i*32)
                .on('end', () => this.setState({x: nextProps.i*32}));
        }
    }
You know the pattern by now, don’t you? Update state, do transition, sync state with reality after transition.
In this case, we change the className, then we move the letter into its new horizontal position.
We could have done all of this in componentWillUpdate as well. However, we can’t do it in componentDidUpdate. We need to know both the current index and the new index. It helps us decide whether to transition or not.
There are instances when the component updates, but its horizontal position doesn’t change. Every time we call setState for example.
render
After all that transition magic, you might be thinking “Holy shit, how do I render this!?”. I don’t blame ya!
But we did the hard work. Rendering is straightforward:
// src/components/Alphabet/Letter.jsx

    render() {
        return (
            <text dy=".35em" y={this.state.y} x={this.state.x} class={this.state.className} style="{{fillOpacity:" this.state.fillopacity}}="">
                {this.props.d}
            </text>
        );
    }
We return an SVG <text> element rendered at an (x, y) position with a className and a fillOpacity. It shows a single letter given by the d prop.
As mentioned, using state for x, y, className, and fillOpacity feels weird. It’s the simplest way I know of to communicate between the render and lifecycle methods.
That’s it
Boom. We’re done.
We have an Alphabet component that declaratively renders an animated alphabet. Letters transition in and out and jump left and right.
All you need now is a skeleton setup that renders an SVG element and uses the Alphabet component.
The key take aways are:
- use d3 for transitions
- use React to manage SVG elements
- use ReactTransitionGroup to get more lifecycle events
- mimic d3’s enter/update/exit pattern
You can learn more about properly integration React and d3js from my book, React+d3js ES6.
Continue reading about Using d3js transitions in React
Semantically similar articles hand-picked by GPT-4
- Animated string diffing with React and D3
- Livecoding #18: An abstract React transition component
- Declarative D3 transitions with React 16.3
- A Dancing Rainbow Snake – An Example of Minimal React and D3v4 transitions
- Silky smooth Piechart transitions with React and D3.js
Learned something new?
Read more Software Engineering Lessons from Production
I write articles with real insight into the career and skills of a modern software engineer. "Raw and honest from the heart!" as one reader described them. Fueled by lessons learned over 20 years of building production code for side-projects, small businesses, and hyper growth startups. Both successful and not.
Subscribe below 👇
Software Engineering Lessons from Production
Join Swizec's Newsletter and get insightful emails 💌 on mindsets, tactics, and technical skills for your career. Real lessons from building production software. No bullshit.
"Man, love your simple writing! Yours is the only newsletter I open and only blog that I give a fuck to read & scroll till the end. And wow always take away lessons with me. Inspiring! And very relatable. 👌"

Have a burning question that you think I can answer? Hit me up on twitter and I'll do my best.
Who am I and who do I help? I'm Swizec Teller and I turn coders into engineers with "Raw and honest from the heart!" writing. No bullshit. Real insights into the career and skills of a modern software engineer.
Want to become a true senior engineer? Take ownership, have autonomy, and be a force multiplier on your team. The Senior Engineer Mindset ebook can help 👉 swizec.com/senior-mindset. These are the shifts in mindset that unlocked my career.
Curious about Serverless and the modern backend? Check out Serverless Handbook, for frontend engineers 👉 ServerlessHandbook.dev
Want to Stop copy pasting D3 examples and create data visualizations of your own? Learn how to build scalable dataviz React components your whole team can understand with React for Data Visualization
Want to get my best emails on JavaScript, React, Serverless, Fullstack Web, or Indie Hacking? Check out swizec.com/collections
Did someone amazing share this letter with you? Wonderful! You can sign up for my weekly letters for software engineers on their path to greatness, here: swizec.com/blog
Want to brush up on your modern JavaScript syntax? Check out my interactive cheatsheet: es6cheatsheet.com
By the way, just in case no one has told you it yet today: I love and appreciate you for who you are ❤️